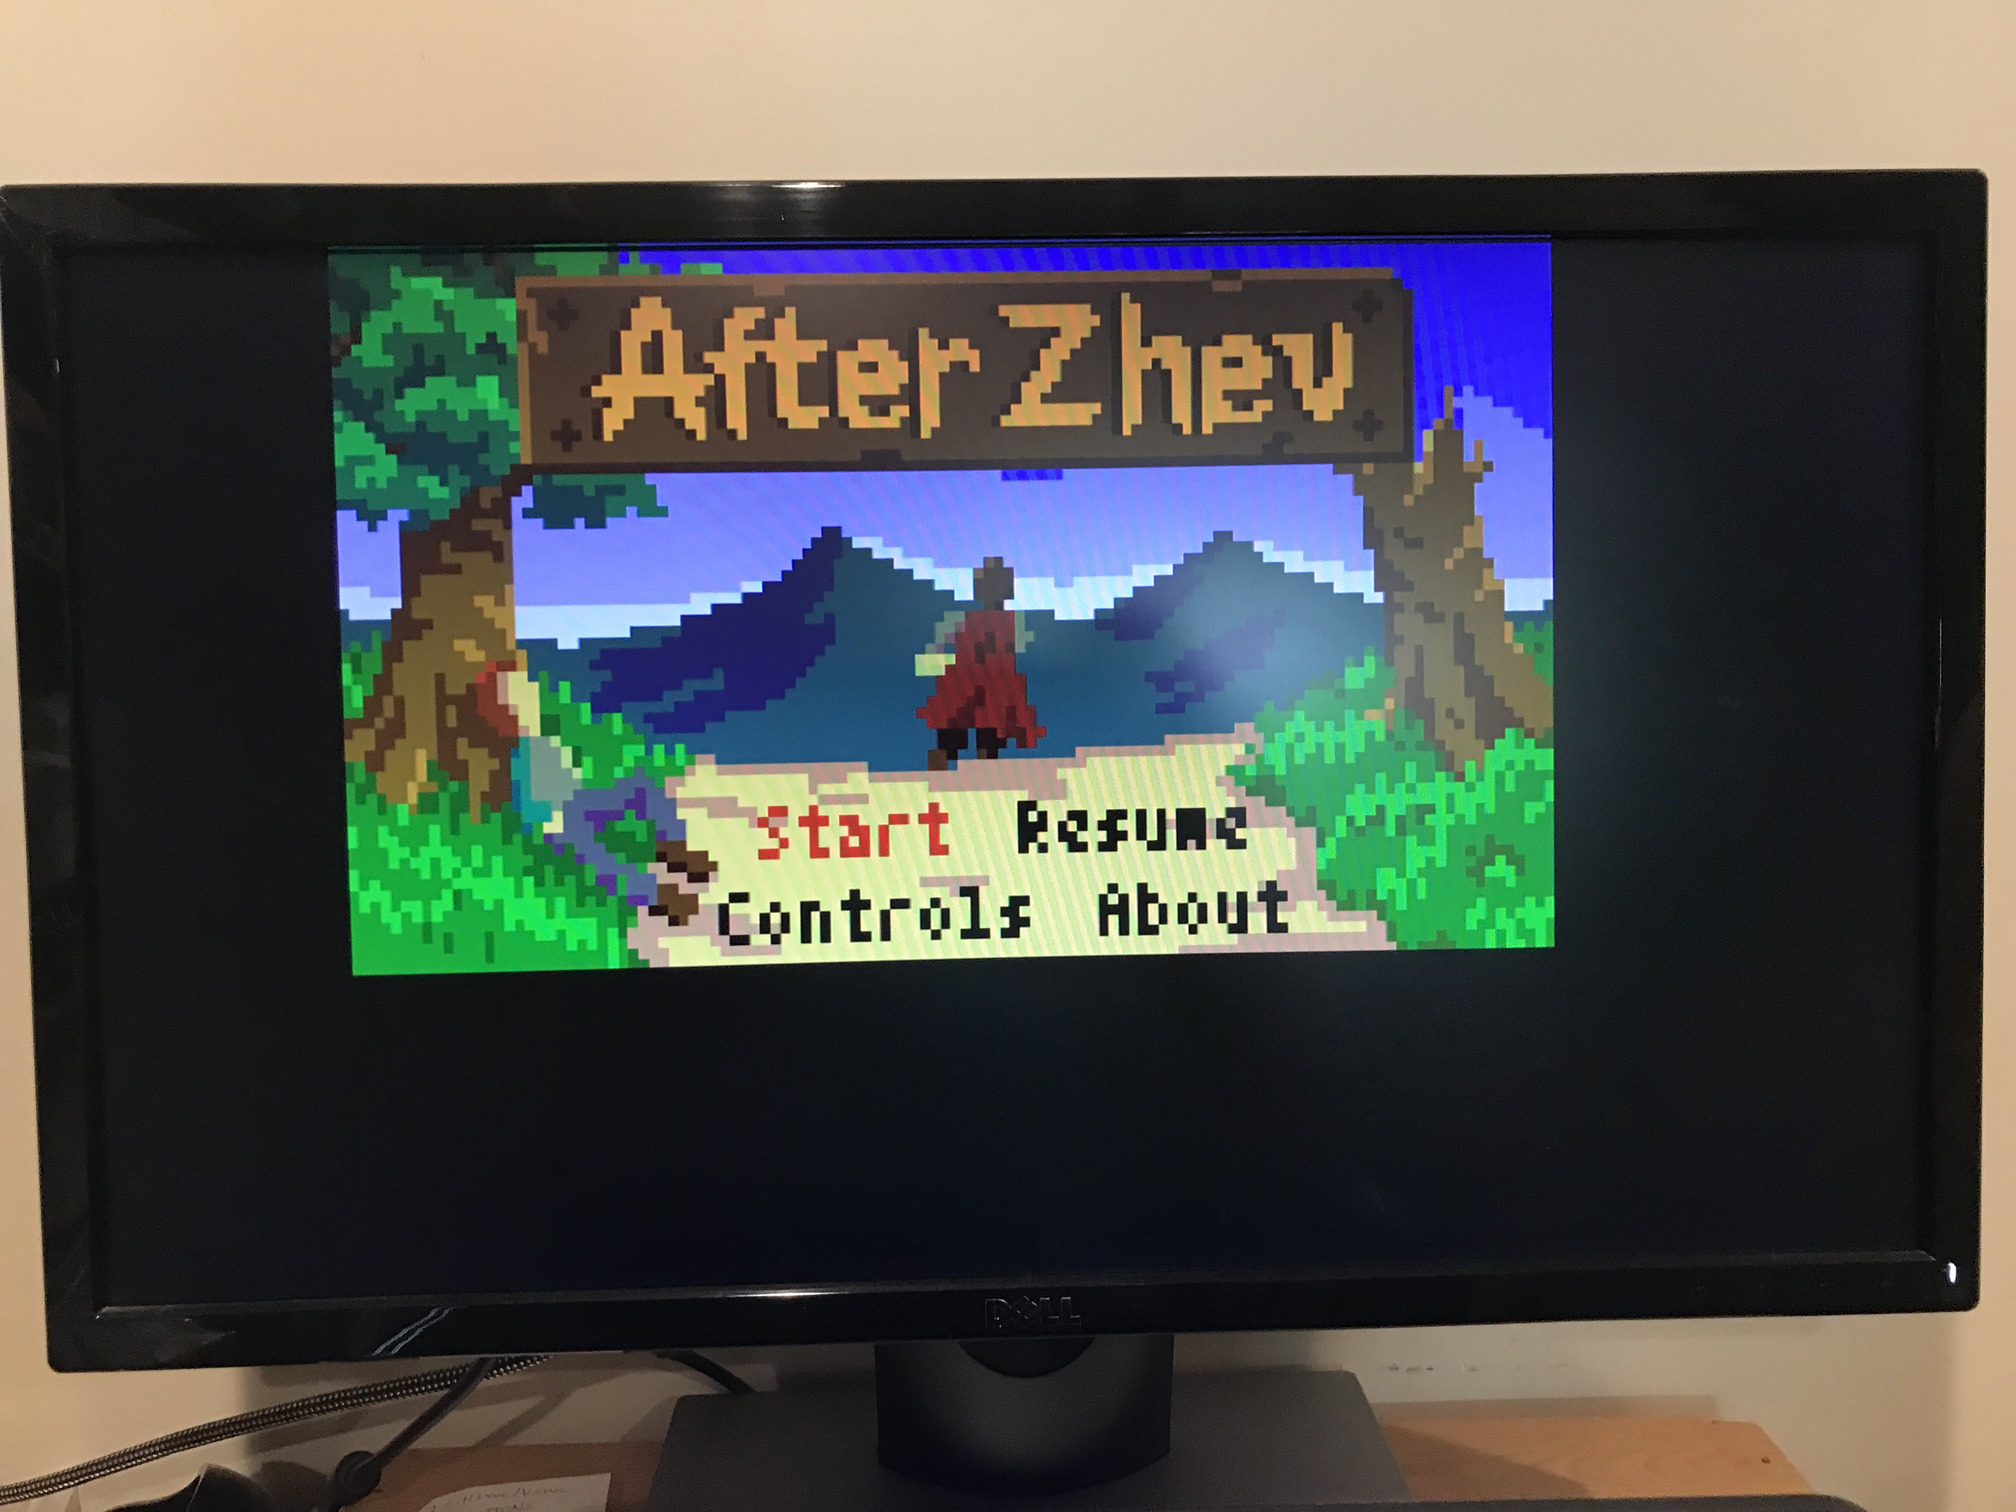
About
AfterZhev is a small RPG that runs on a single 16 MHz ATmega2560 microcontroller, plus some passive components, and is compatible with the Arduino Mega 2560. Perhaps unwisely, it was written entirely in AVR assembly.
AfterZhev tells a tale of betrayal, the story of a brave messenger risking everything to recover a stolen letter. Along the way, you encounter bandits, foxes, and a secret cult. You can complete the game in less than four minutes, but first-time players will probably need an hour or so.
The game is sort of intended to be played on a physical microcontroller along with a VGA monitor and a NES controller, but you can also play online here!
Details
The ATmega2560 microcontroller is a pretty powerful 8-bit chip, but still pretty restricted. It runs at 16 MHz, has 8 KB of SRAM, 256 KB of program memory, and 4 KB of EEPROM. Of this, AfterZhev uses all but three bytes of SRAM (mostly for the 120x66 framebuffer), 200 KB of program memory, and about 84 bytes of EEPROM (for a saved game). In addition, around half of CPU time is spent generating a 60 Hz 640x480 VGA signal. All game logic and rendering is performed during the vertical blanking interval plus a lower portion of the image interval, and as a result, AfterZhev is tightly linked to a 60 FPS framerate.
AfterZhev is written entirely in AVR 8-bit assembly. I started writing the game in C, but quickly ran into difficulties. The entire game runs within an interrupt service routine (questionable, sure), which meant that the standard ISR prologue and epilogue had to account for nearly every register, wasting precious memory and cycles. However, marking the ISR as NAKED_ISR resulted in frequent crashes when optimizations were enabled. Since avr-gcc generates very suboptimal code without optimizations, I turned in frustration to assembly.
Using assembly meant that I could optimize everything, and carefully allocate registers and memory. On the other hand, it also mean that I had to carefully allocate registers and memory. For example, here’s a subroutine that renders a string displaying an item’s effect on a stat (e.g. strength, dexterity, etc):
; Render an item stat boost with color.
;
; Register Usage
;   r20-24          calculations
;   r25             stat boost value (param)
;   X (r26:r27)     working framebuffer pointer
;   Y (r28:r29)     framebuffer pointer (param)
;   Z (r30:r31)     stat abbreviation pointer (param)
render_item_stat:
    push r25
    ldi r21, 6
    clr r23
    call puts
    subi XL, low(4*FONT_DISPLAY_WIDTH+FONT_DISPLAY_WIDTH/3) ; puts changes X
    sbci XH, high(4*FONT_DISPLAY_WIDTH+FONT_DISPLAY_WIDTH/3)
    pop r21
    ldi r23, 0x18
    ldi r20, '+'
    cpi r21, 0
    brge _rit_write_stat
    ldi r23, 0x04
    ldi r20, '-'
    neg r21
_rit_write_stat:
    call putb
    mov r22, r20
    call putc
    clr r23
    ret
I didn’t want to use the stack more than absolutely necessary (push and pop are an exorbitant two cycles apiece, and memory was also precious), so I manually tracked register allocations for each subroutine. This was painful and resulted in more than a few bugs. For consistency, I allocated registers vaguely following the avr-gcc ABI:
r0andr1were the temporary scratch register and the zero register, respectively.r2-r12were reserved for audio. No other code ever touched them.r13-r17were callee-saved registers.r18-r19andr28:r29(Y) were callee-saved where convenient.r20-r25,r26:r27(X), andr30:r31(Z) were caller saved. Most often,r25held the return value for the few subroutines that needed one.
In practice, I frequently broke every one of these conventions (except for messing with r2-r12).
Art
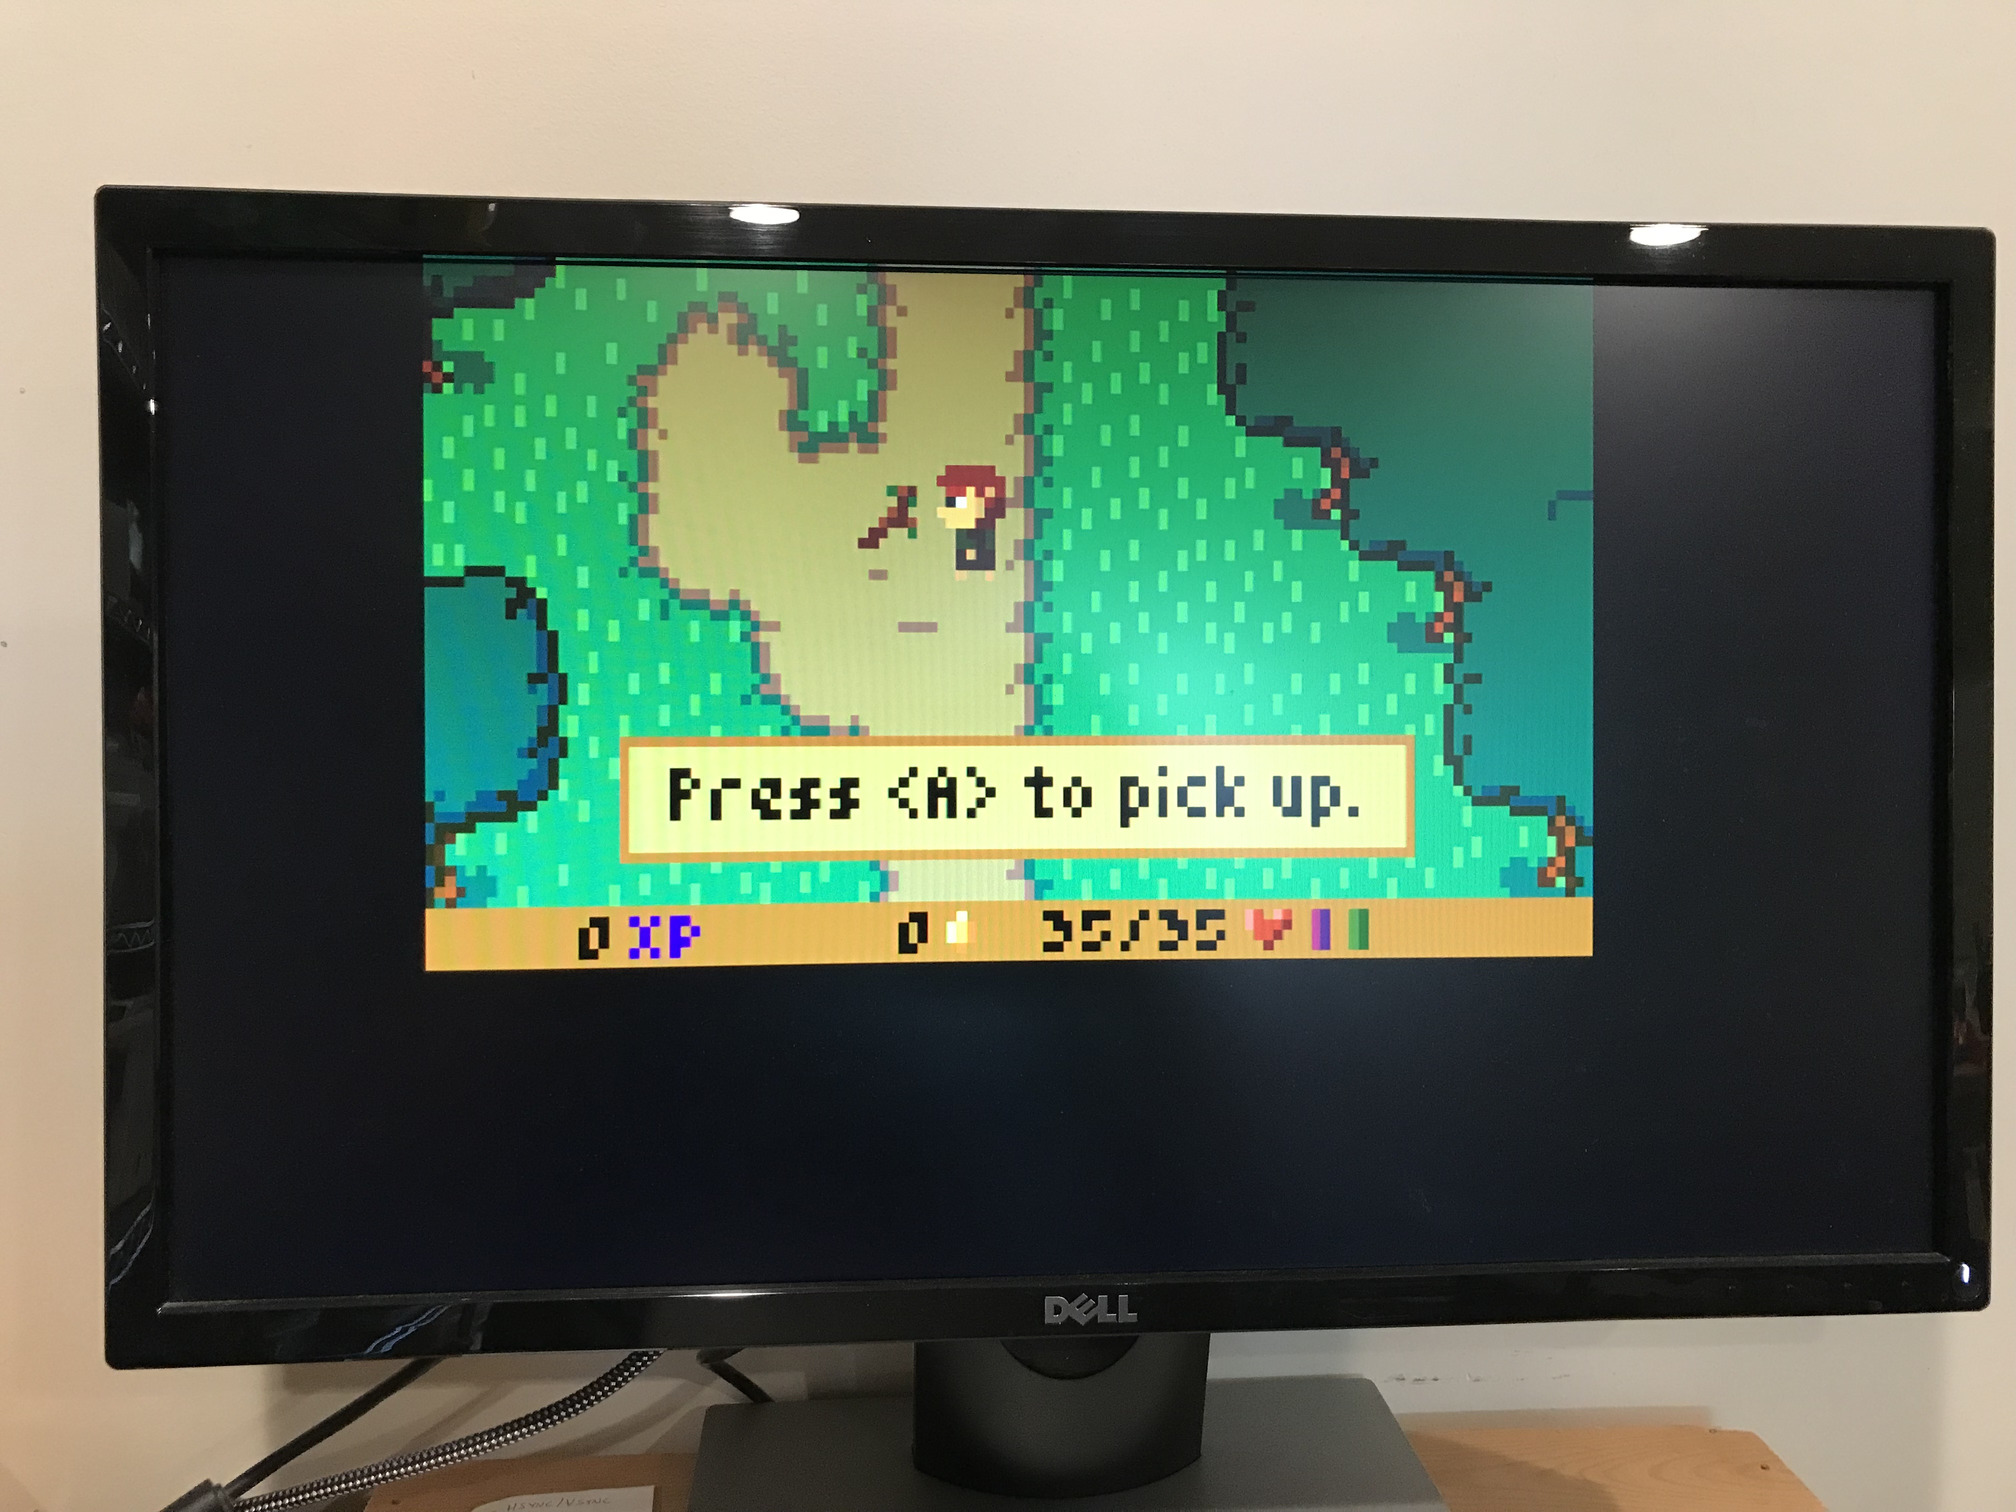
With an effective screen resolution of 120x66, pixel art was pretty much inevitable. I originally hoped to use assets from opengameart.org, but quickly found that existing character sprites and tilesets were far too big, generally around 32x32 pixels. For AfterZhev’s tiny screen, I wanted character and tile sizes of 12x12 pixels. In the end, I ended up making all the game art myself, with the help of Pedro Medeiros’ superb Pixel Art Tutorials.
Choosing colors was unexpectedly difficult. AfterZhev uses 8-bit R3G3B2 colors, which results in a large but unwieldy palette. A lot of the colors are either under or over saturated and many don’t look good together. I’d much sooner be given a 32-color palette with nice colors than the 256-color 8-bit palette.
Fonts
I considered some incredibly tiny fonts, such as this 3x3 one, but they were pretty much unreadable. In the end, I went with a Brian Swetland’s and Robey Pointer’s 3x5 “Tom Thumb” font, which struck a really nice balance between size and legibility. I also used Matthew Welch’s “Tiny” font in places where I needed something even smaller.
Music
For a few months, I planned to re-arrange Alexander Borodin’s Polovtsian Dances in AfterZhev, but eventually decided against it. The music is really beautiful and it seemed vaguely disrespectful. Instead, I spent a week trying things out on the piano until I came up with something that sounded pretty good.
Thoughts
Some things that worked out well
- One of the best decisions I made was to allow room-specific code to run at specific trigger points, such as once per frame, whenever the player entered a room, left a room, or started a conversation. The majority of low-level NPC behavior is described declaratively, but allowing arbitrary code allowed me to script unique encounters.
- Another good choice was to use existing tools. My instinct was to create my own pixel editor that would read and edit assembly
.dbdirectives directly, to create my own level designer, and perhaps my own assembler. This would have been an tremendous time sink. Instead, I used Aseprite to edit sprites, tiled as a level editor, and AVRA to assemble the code. Of course none of these tools were exactly what I wanted, and they all had annoying bugs. Despite this, they were better than what I could have written. - On the other hand, sometimes existing tools aren’t enough. Four or five months into development, I realized that the existing AVR simulators were too slow to run AfterZhev in real time. So I wrote slimavr, a AVR simulator with a strong focus on speed over completeness. It took a few months, but it can run AfterZhev over twice as fast as the physical microcontroller and is the only reason the game can be played online. This took a few months, but it was a good use of time.
- Another good decision was made accidentally. AfterZhev contains several bitfields that describe whether an item has been picked up, a conversation has been held, or an NPC has been killed. Somewhat arbitrarily, I chose
1to denote not picked up/not held/not killed, and0to denote the opposite. Months later, I realized that this made game saves complete much faster than expected. It turns out that the initial value of EEPROM is0xff, which mean that the game could skip writing a dozen or so bytes. Since writing EEPROM is slow, ~4 ms per byte, this made a significant difference.
Some lessons learned
- Nearly all other AVR-based games output a NTSC or PAL video signal rather than VGA. These video formats run at 25/30 FPS, which gives a lot of extra runway for game logic. It also makes it possible to generate higher resolution video. I chose VGA because I didn’t have a monitor with composite input and I wanted to avoid using any external chips, but I’m not sure this was the right choice.
- In fact, outputting NTSC or PAL would probably have meant that I could have used C instead of assembly. There’s no question that using assembly allows some serious optimizations, but it also adds a massive layer of complexity to every line of code.
- The story is confusing. The idea, which I tried to convey through the introduction sequence and various conversations, is that you and Zhev are two envoys on a mission for the Queen. Zhev stole a letter for some nefarious purpose, and your honor and life depend on chasing “after Zhev” and getting it back. I think the plot is fine for a short game, but it’s not communicated particularly well.
- Similarly, AfterZhev’s gameplay is sort of bland. It has classic functionality like shops, NPC conversations, quests, character stats, equippable items, temporary boosts, and whatnot, but it doesn’t contain any particularly clever gameplay elements. You just bash your way from one quest to the next. This isn’t the end of the world for a short game like AfterZhev. Still, I probably should have taken some time to invent some overarching gameplay vibe.
Source code
The repository is hosted on GitHub, along with instructions for compilation. On Linux, everything should work once you’ve installed the dependencies; Windows will probably be more difficult. Also, I can’t in good conscience recommend using the AfterZhev engine in other games, but if you do, I’d love to see them!
Construction
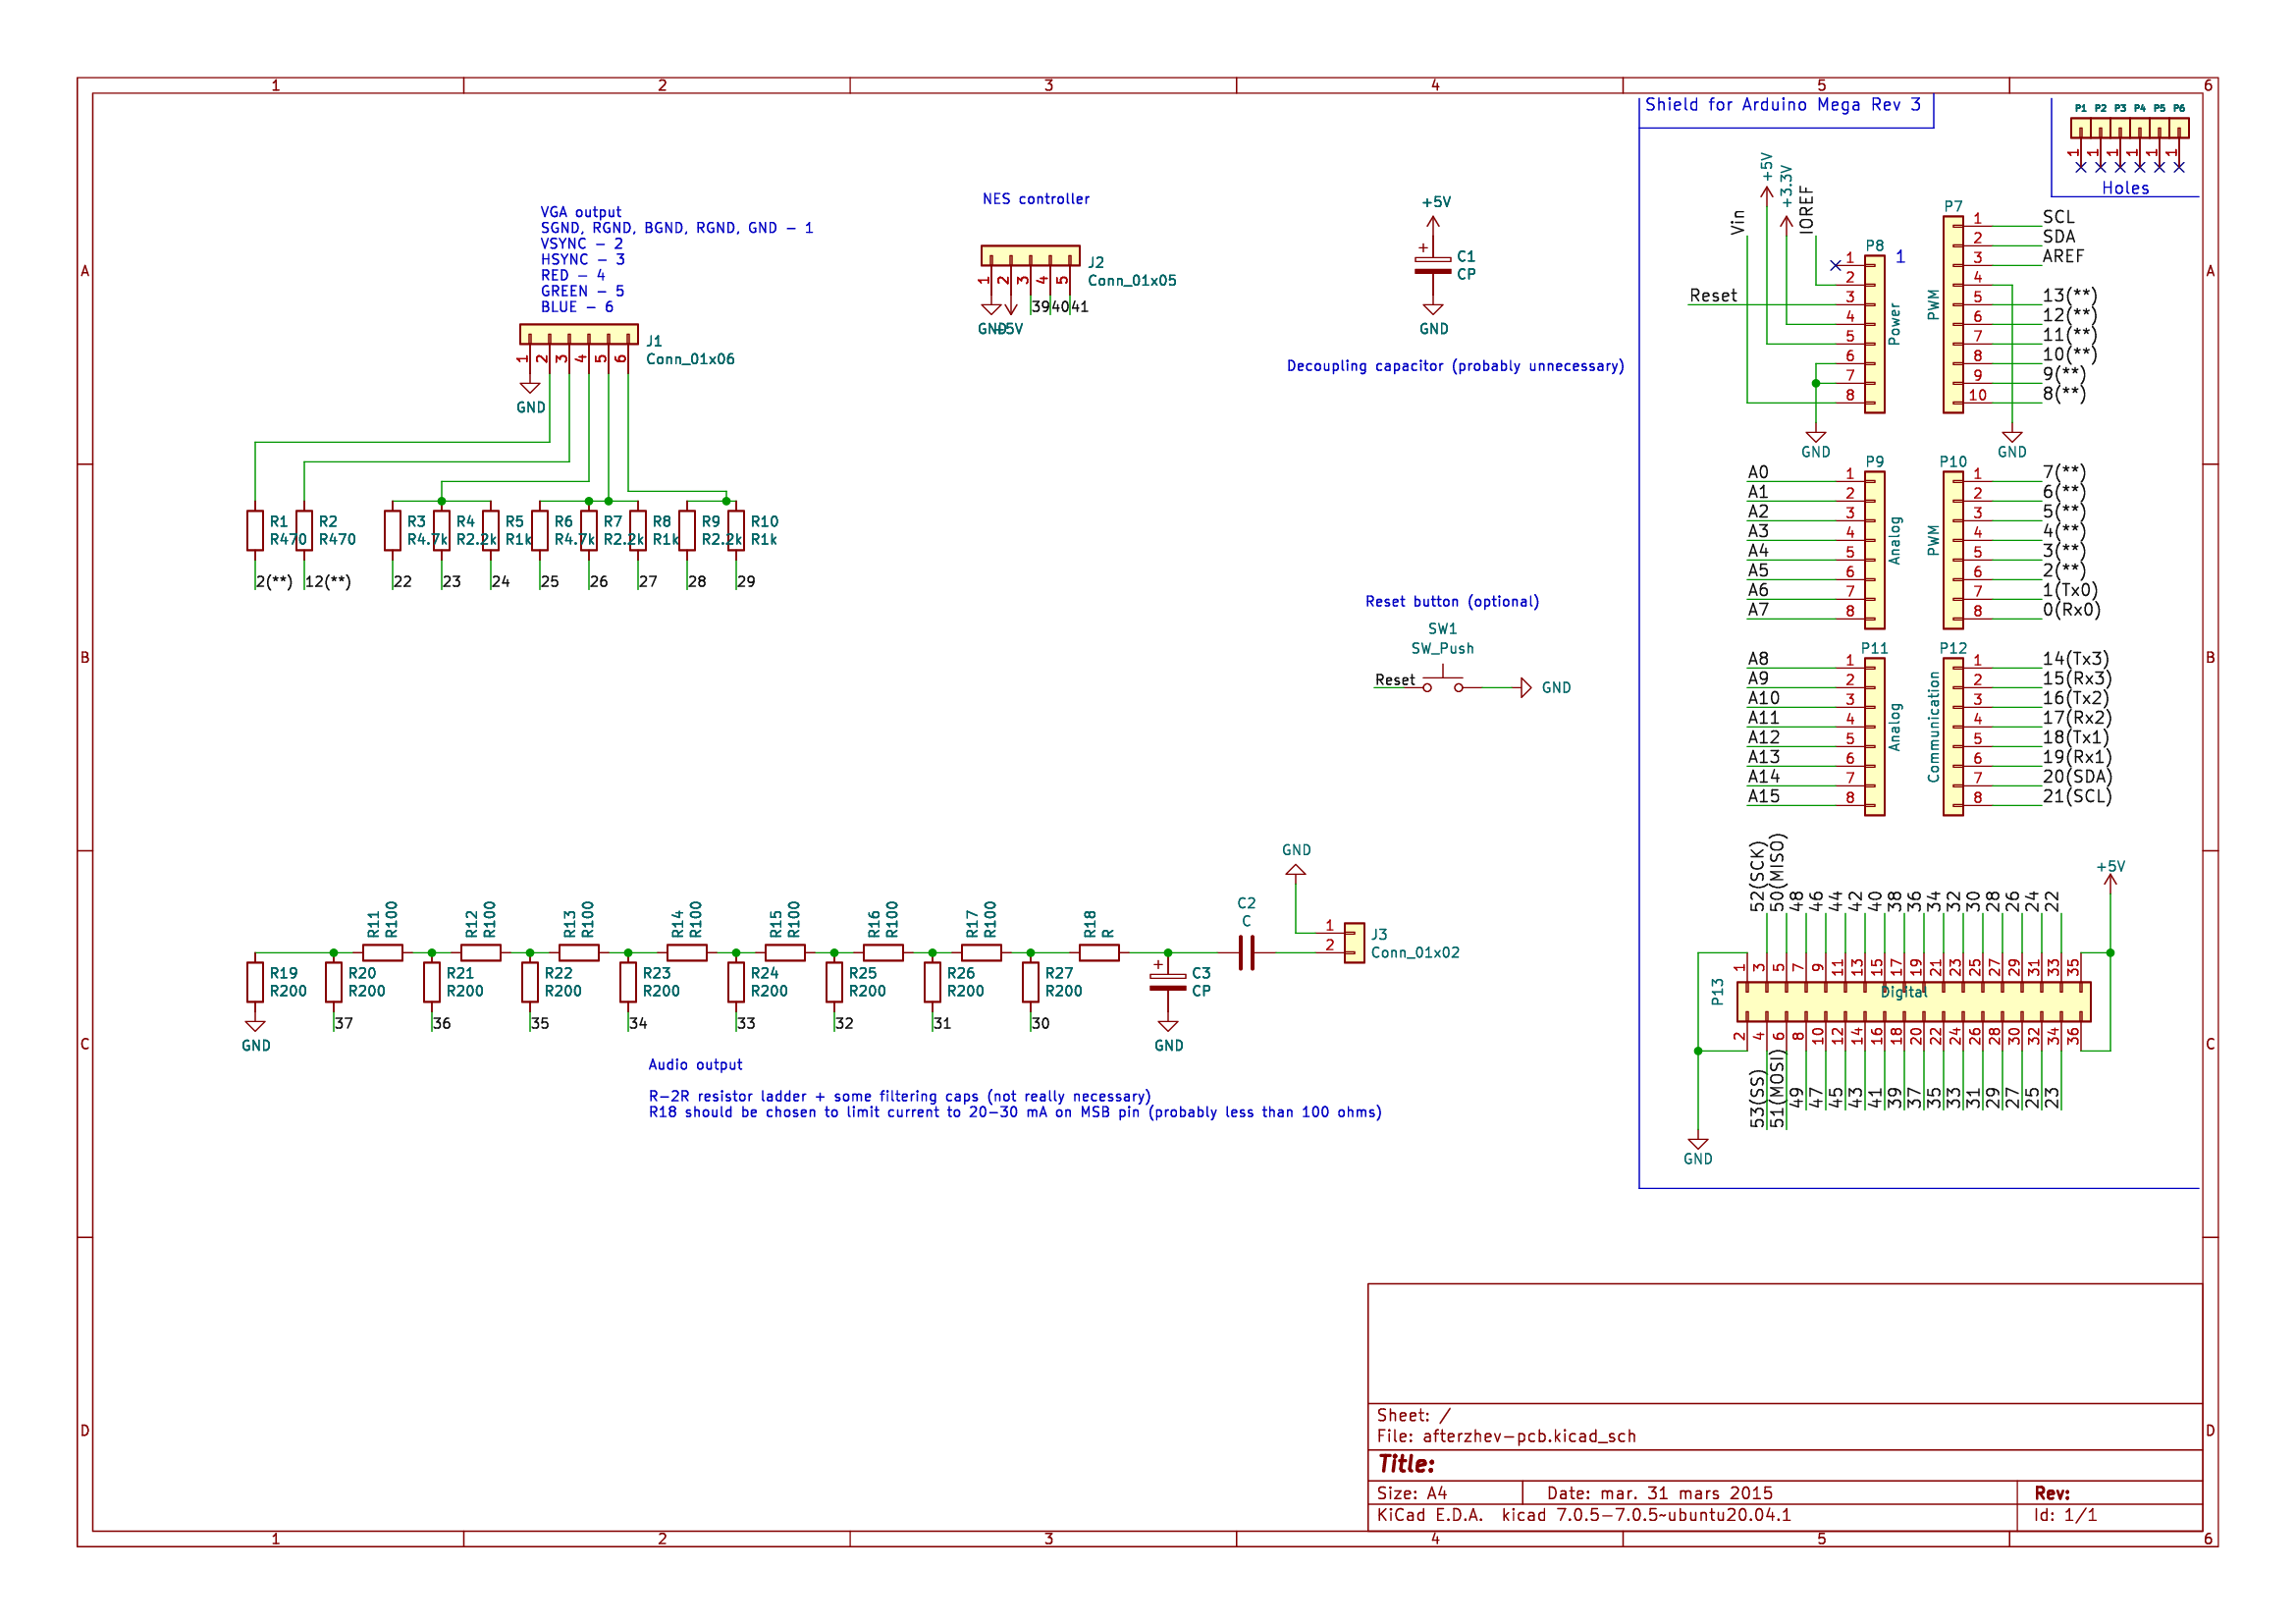
AfterZhev outputs a 60 Hz 640x480 VGA signal:
- HSYNC on pin PB6 (pin 12 on Arduino Mega 2560)
- VSYNC on pin PE4 (2 on Arduino)
- RRRGGGBB image on pins PA0-PA7 (22-29 on Arduino)
You can use proper digital-to-analog circuitry for each color channel, but since 8-bit color is pretty imprecise and the VGA impedance is fixed, it works pretty well just to weight the channel pins with 1:2:4 resistors. I used 1k, 2.2k, 4.7k resistors since that was what I had on hand.
AfterZhev also outputs audio on pins PC0-PC7 (37-30 on Arduino), where PC7 (30) is the most significant bit of an unsigned 8-bit sample, and PC0 (37) is the least significant bit. I used an R-2R (R=100 ohms) resistor ladder as a digital-to-analog converter. Without an amplifier, the main thing is to keep current less than 20-30 mA through any pin.
Finally, AfterZhev uses a NES controller (I’ve successfully tried both an original Nintendo controller and a clone):
- LATCH on pin PG0 (41 on Arduino)
- CLOCK on pin PG1 (40 on Arduino)
- DATA on pin PG2 (39 on Arduino)
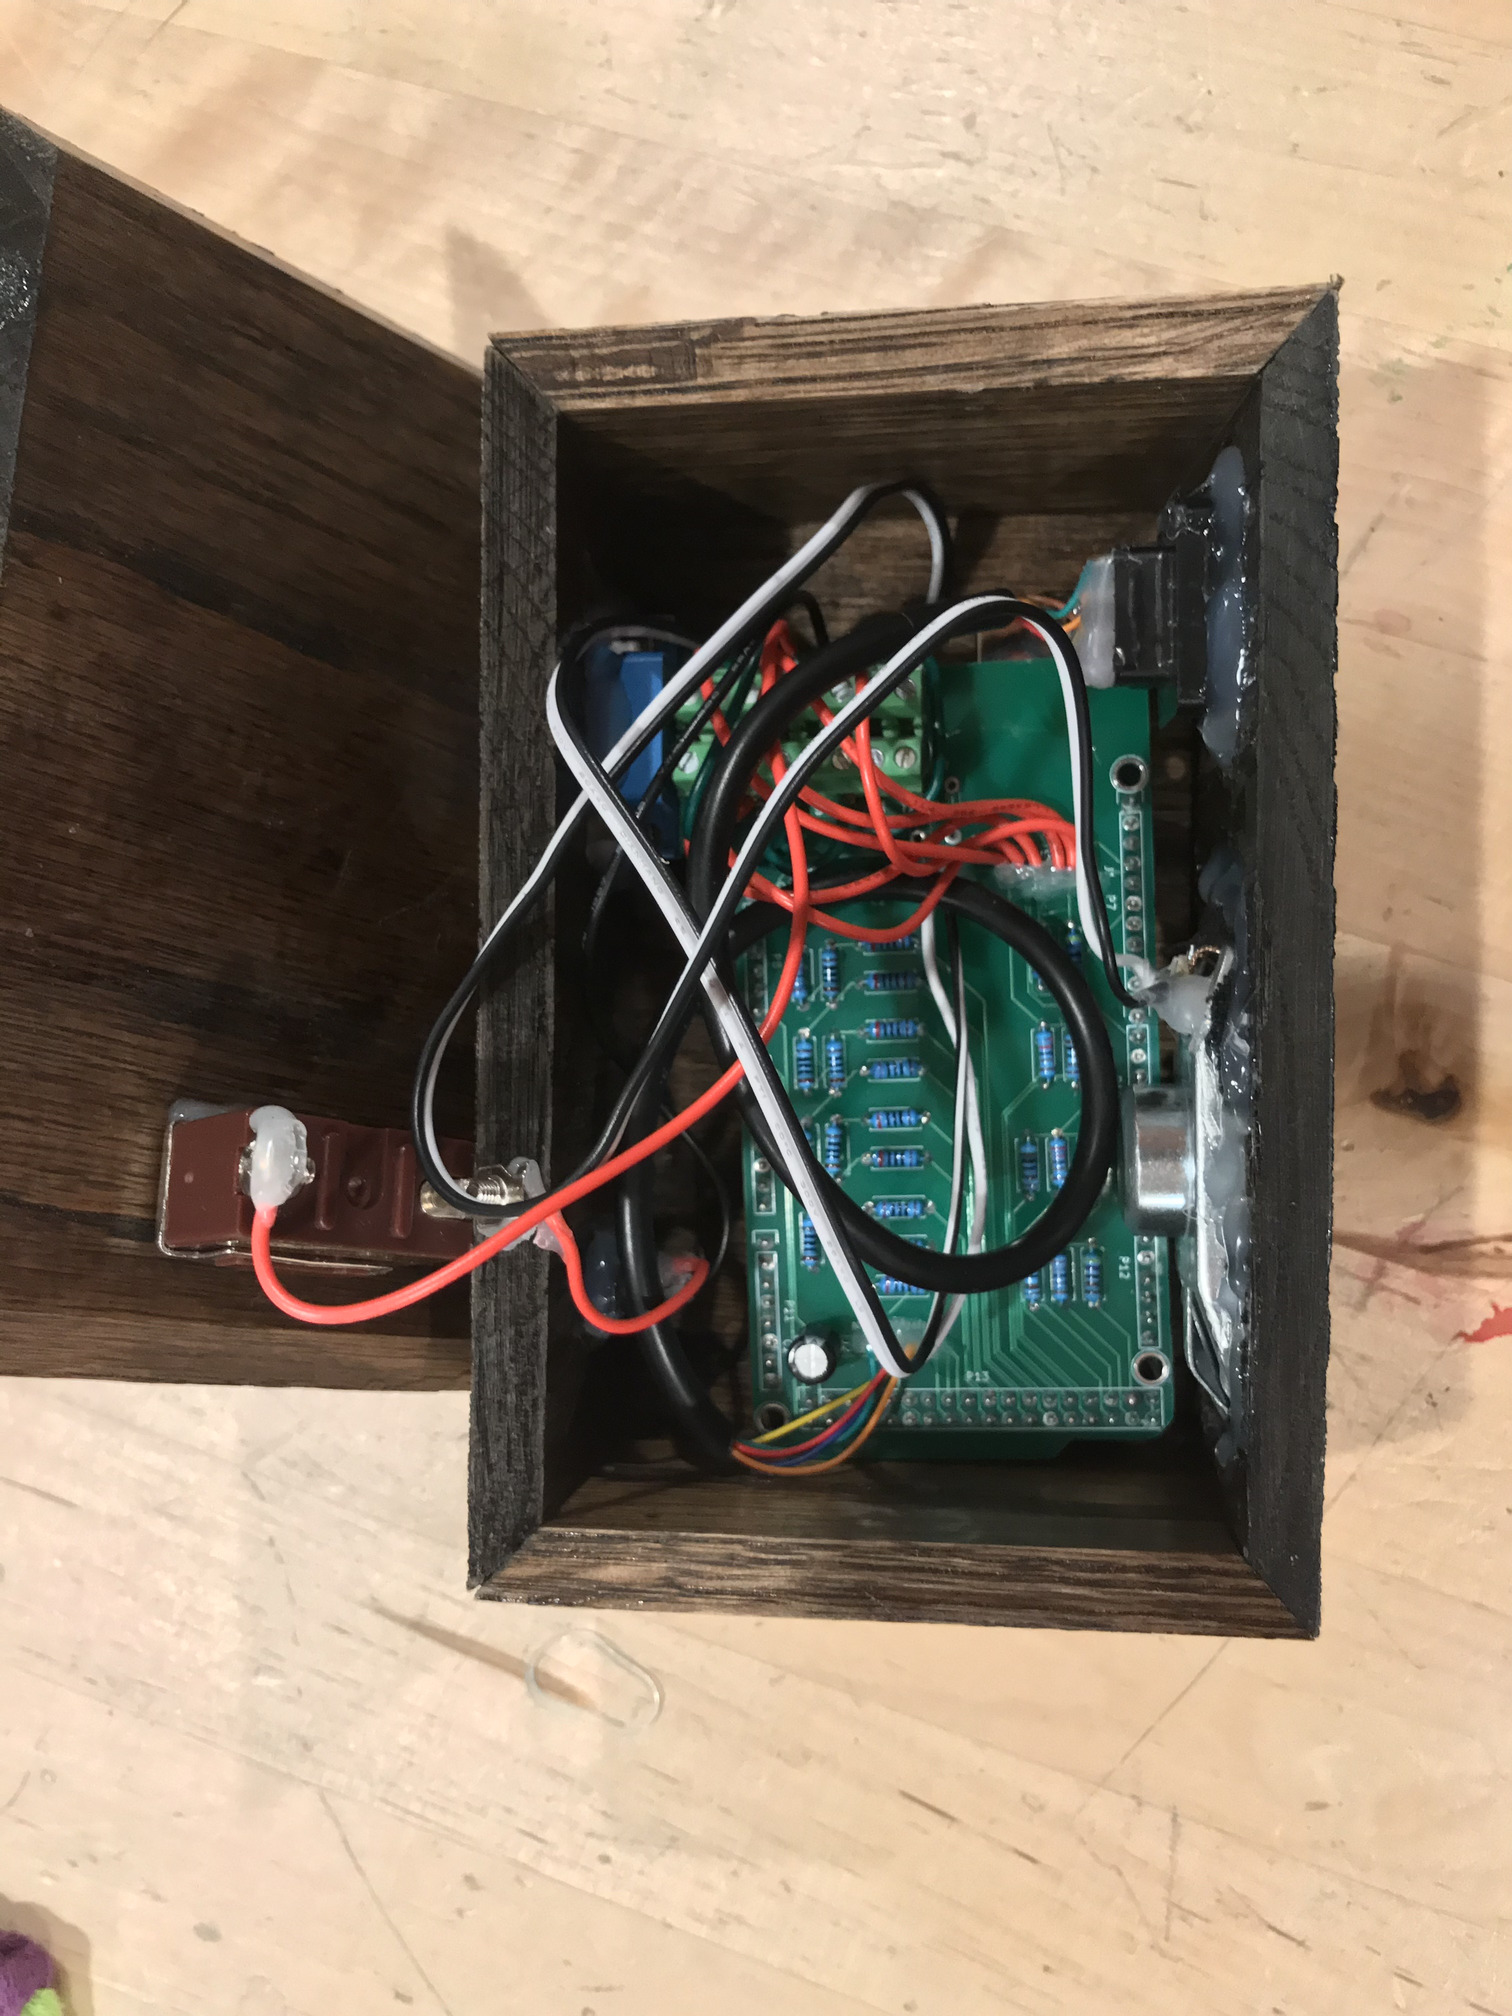
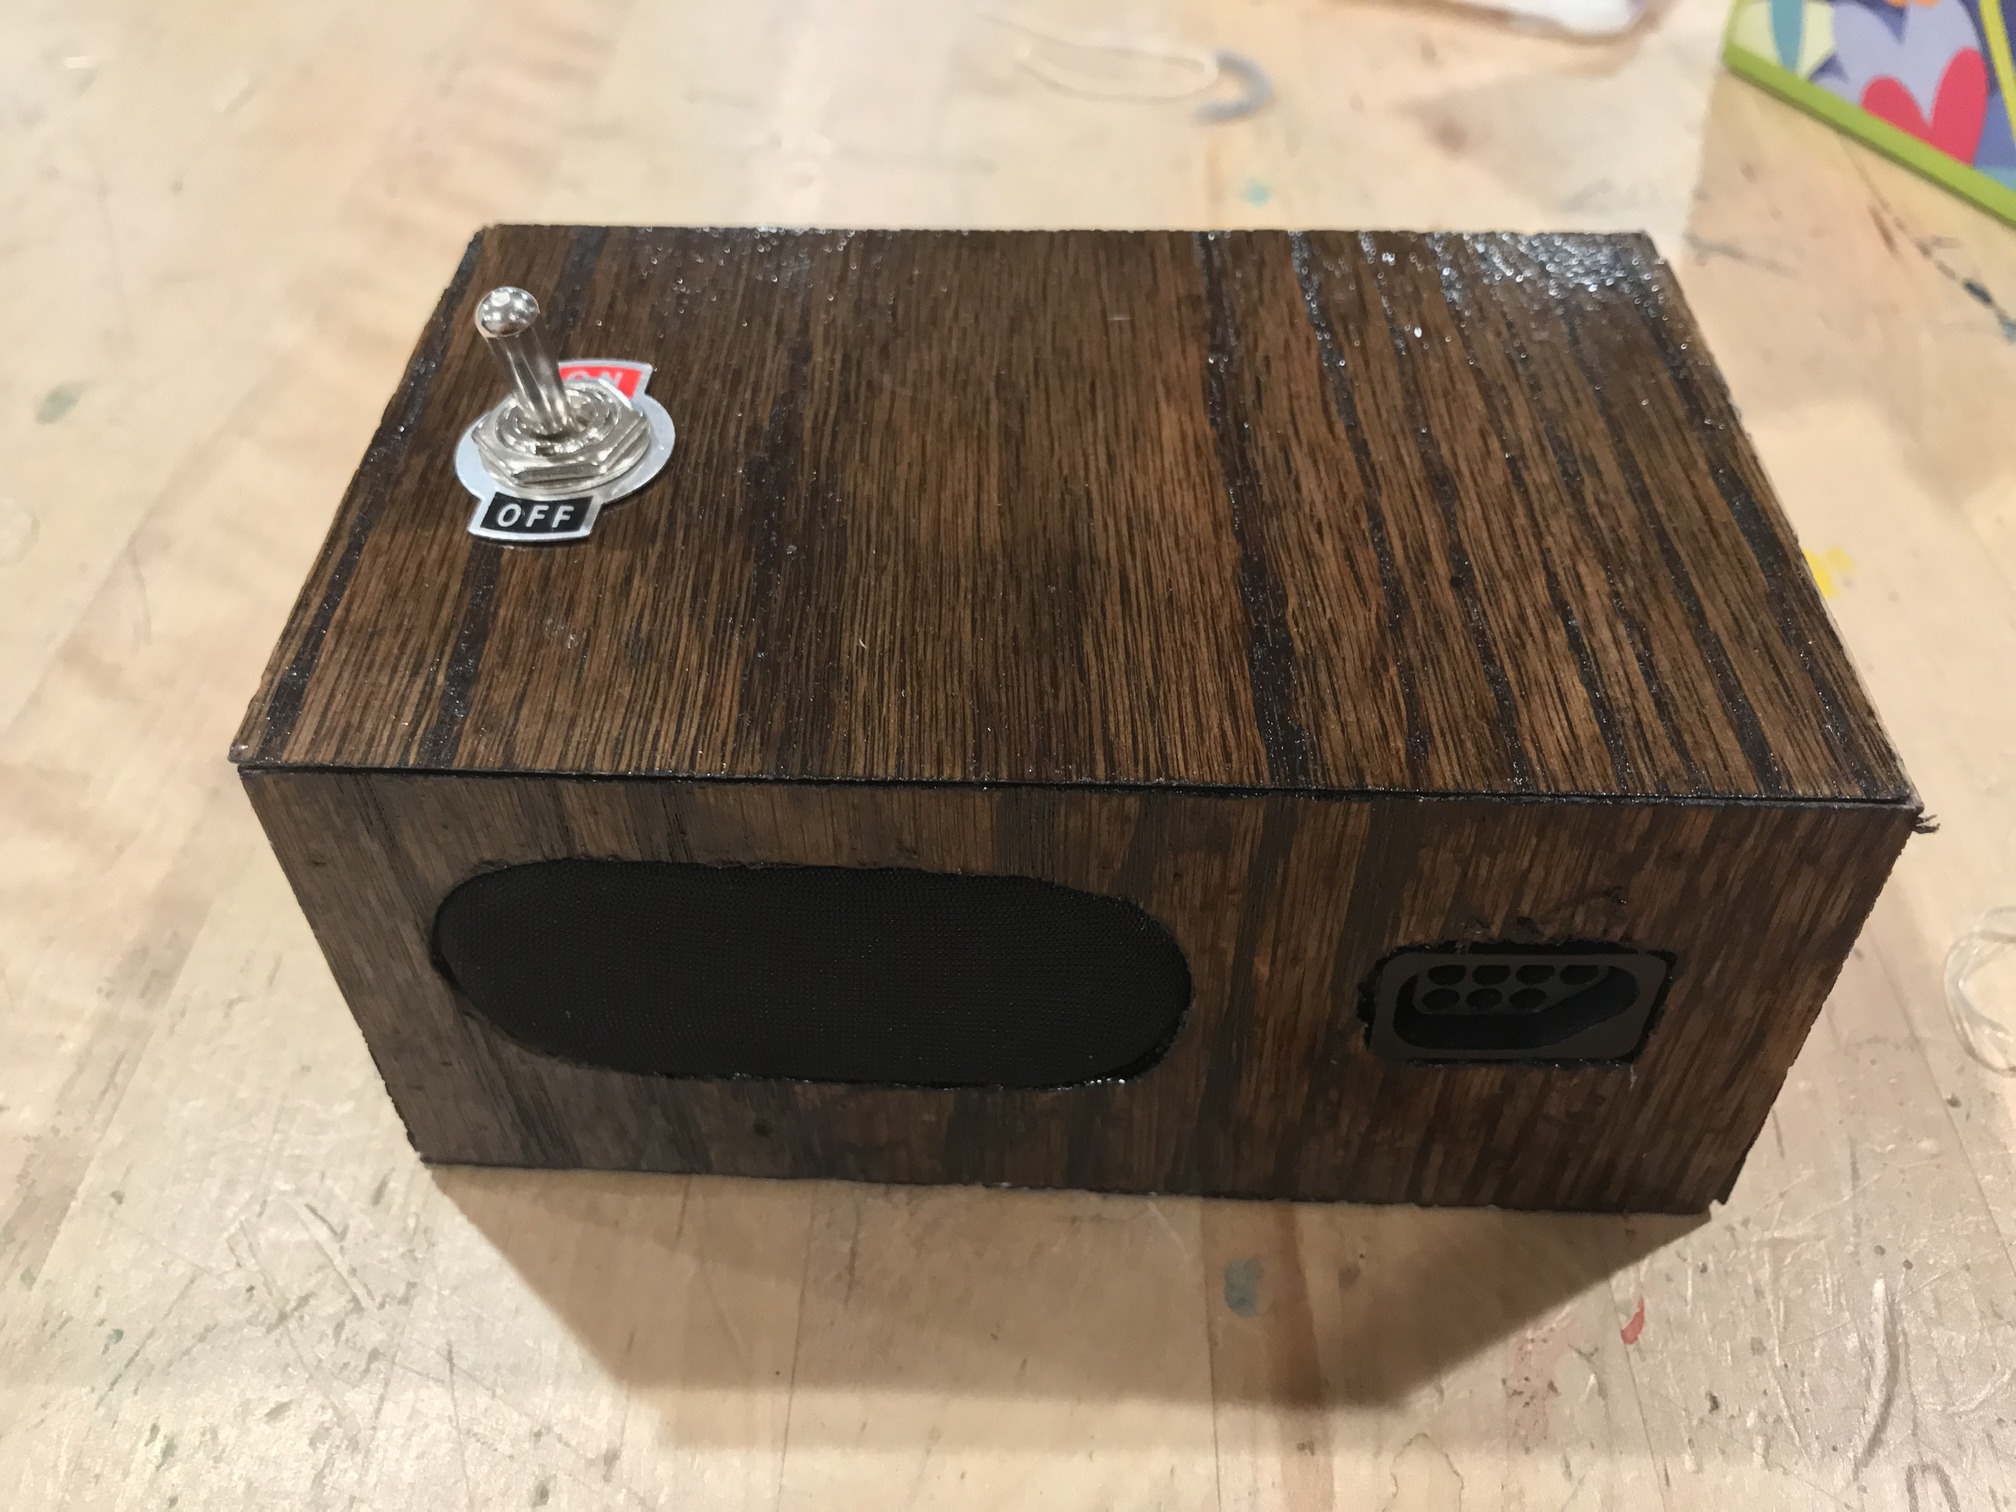
I originally implemented the VGA circuit on a breadboard, and later a solderable perfboard, but ordered a PCB from JLCPCB for the final version. It arrived in about a week and was far easier than wiring up the two dozen or so resistors by hand. Here’s the schematic and the final populated PCB:

Resources and inspiration
- Nick Gammon’s VGA tutorial blew my mind when I first came across it in high school. Until then, I hadn’t realized it was possible for an Arduino to do more than blink lights and turn motors.
- Radical Brad’s Quark 85 takes audio and sound generation to a whole new level, using a tiny, heavily overclocked ATtiny chip to produce some amazing graphics.
- Uzebox is a legitmate ATmega644-based game console, capable of producing some really nice graphics. In fact, its video and sound are far better than AfterZhev’s, and it looks like it’s much easier to program as well. The only disadvantage is that isn’t Arduino compatible and requires a lot of external circuitry.
- Toorum’s Quest II by Peten Paja is a small platforming game that runs on an ATmega328 chip and is compatible with the Arduino Uno. The game’s graphics and audio capabilities are impressive, especially because they’re crammed into such a small microcontroller.
Gallery